How to connect two PCs on Windows 10 for file sharing
Part of your rebuilt static knowledge blog.
- Basic Windows sharing: This is a simple way to share files with people on your local network without having to mess with complicated settings.
- Advanced Windows sharing: You can also use the built-in advanced Windows sharing feature. It's more flexible than the basic sharing method.
1. File sharing using Basic Sharing on Windows 10/11
- Open File Explorer.
- Navigate to the folder you want to share.
- Right-click the item, and select the Properties option.
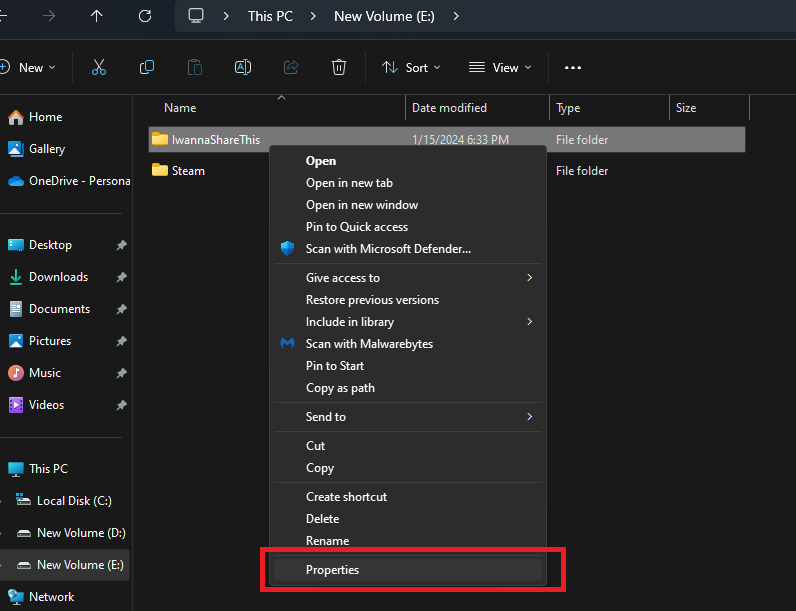
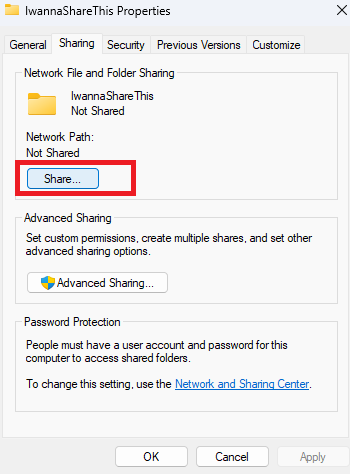
- Go to the Sharing tab.
- Click on the Share button.
- Click the drop-down menu and select the user or group to share the folder with. (For this example, we will select the Everyone group.)
- Click the Add button.
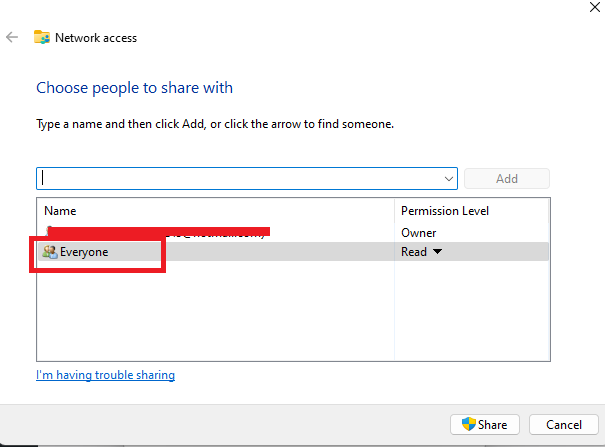
- In the “Permission Level” section, you can select the sharing permissions you want the users to have. For example, you can choose Read/Write, if you want users to view, open, delete, and modify the contents on the shared folder.
- Click the Share button.
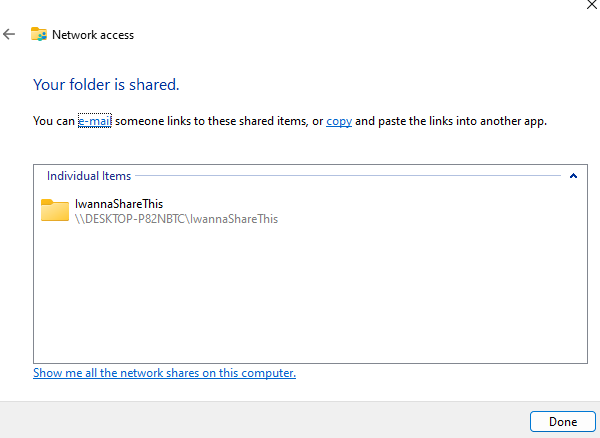
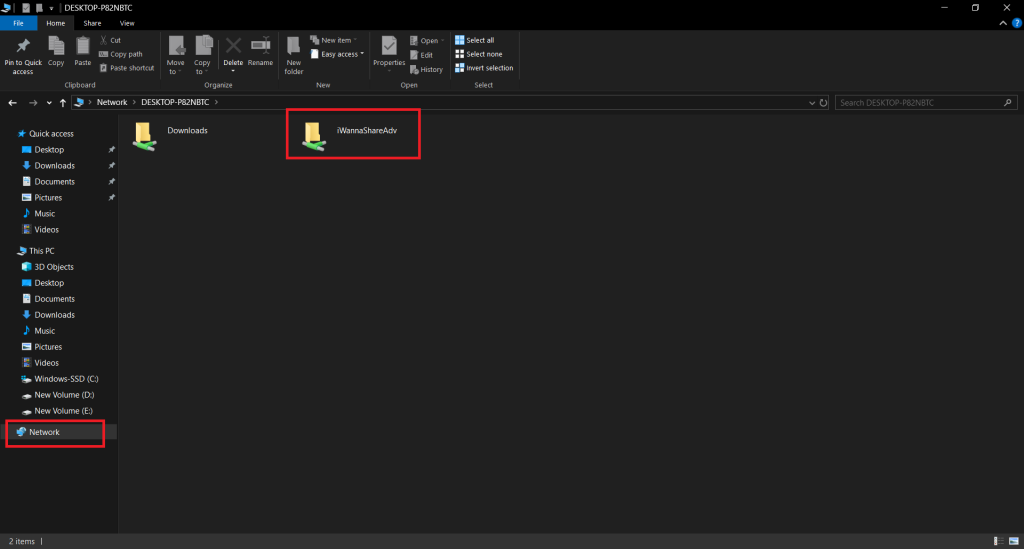
- Note down the shared folder’s network path that other users need to access the folder's content and click Done.
- Click the Close button.
2. File sharing using advanced settings on Windows 10/11
To share files in the network using the advanced sharing settings, follow the steps below:- Open File Explorer.
- Go to the folder you want to share.
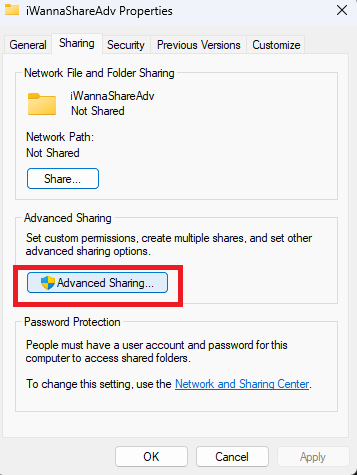
- Right-click the folder and select Properties.
- Go to the Sharing tab.
- Click Advanced Sharing.
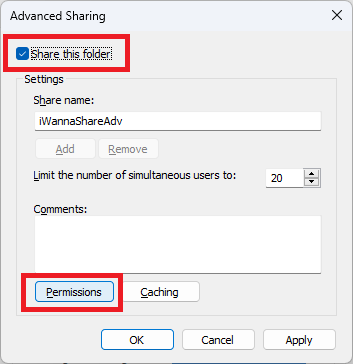
- Check the “Share this folder” option.
- Click Permissions.
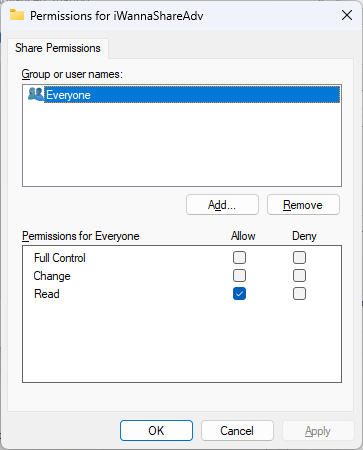
- Select the Everyone group.
- Check the permissions for the shared folder:
- Full Control: Gives the users the ability to read, change, and edit permissions.
- Change: Users can read, run, write, and delete files and folders in the shared location.
- Read: Allows users to only access and view the contents of the shared folder.
- ClickApply.
- Click OK.
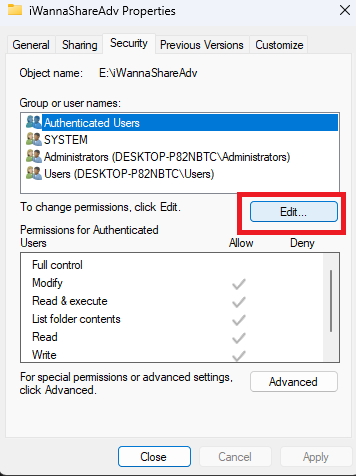
- Go to the Security tab.
- Click Edit.
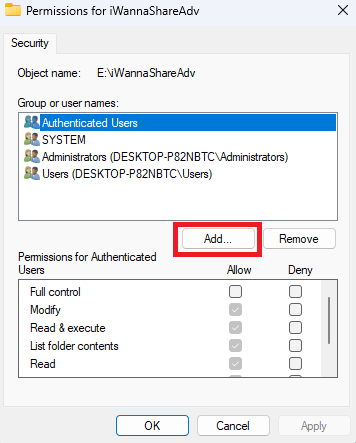
- Click Add.
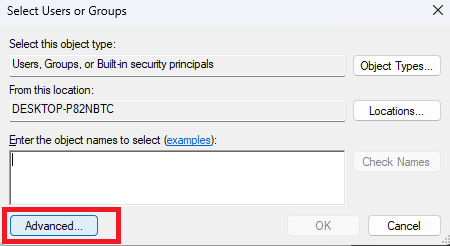
- Click Advanced.
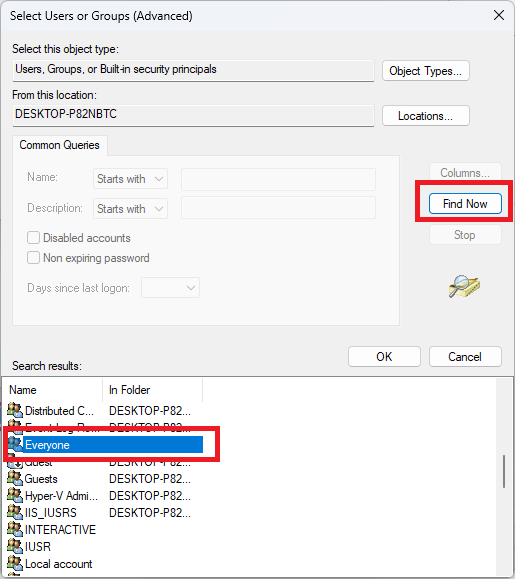
- Click Find Now.
- Select the Everyone group.
- Click OK.
- Click OK again.
- Select the Everyone group again.
- Check the Full control option.
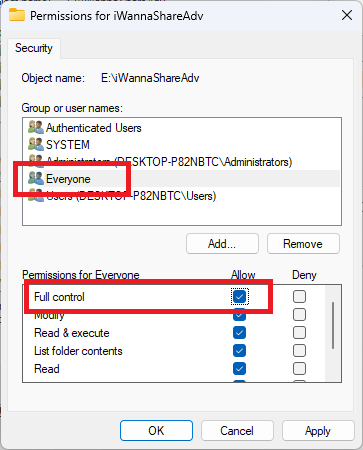
- Click Apply.
- Click OK.
- Click the Close button.
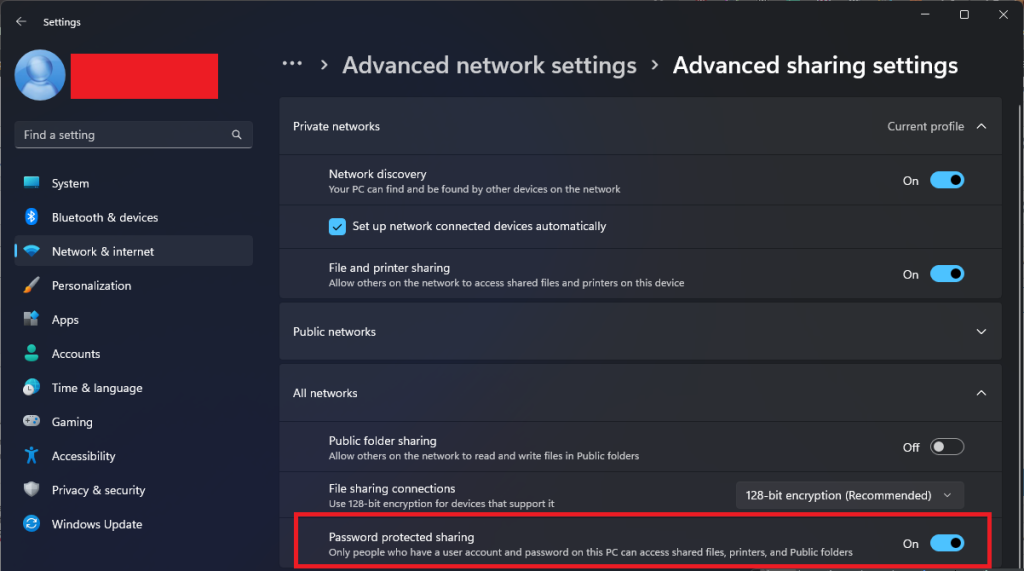
Disable file-sharing password on Windows 10/11
If you keep running into a pop-up asking you to sing-in before you can access the shared folder then you can disable disable password protection for file sharing on Windows 10/11, use these steps:- Go to Settings.
- Click Network and Internet.
- Click Network and Sharing Center.
- Click the “Change advanced sharing settings”.

- Expand the All Networks tab.
- Select the “Turn off password-protected sharing” option.
- Click Save changes.